Monday, August 13, 2012
Pardon the Interuption...
Our little girl came August 1st, a few days early!! We are so overjoyed, loving every minute spent with her. It may be a few days before I get back to sewing (but in case you were wondering, I did finished the nursery JUST in time :-) )


Thursday, July 19, 2012
Blocks and A Preview
In between all the baby showering, cleaning, working and napping, I've actually managed to fit in some sewing. June was my last month participating in do.Good Stitches, and even though I thought my blocks were going to be way late, I actually managed to get them out on time..go me!

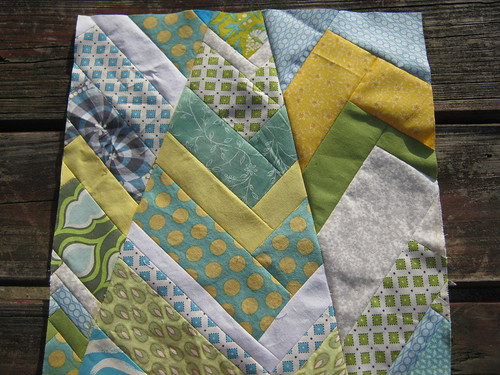
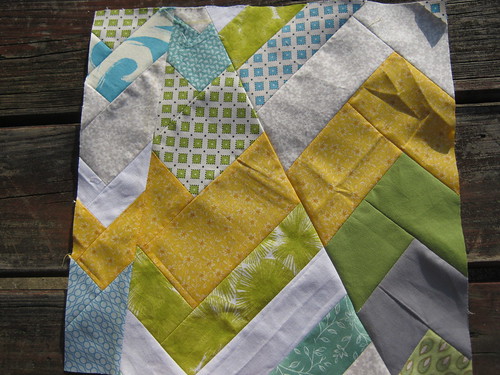
For this month, Amanda of My Sewcial Hour picked one of my fav color schemes-yellows, blues, greens, whites and grays, so I had lots of scraps to work with. The block we made is the Improv Chevron using this tutorial by Six White Horses. If you've been reading my blog for any length of time, you probably know that I'm not at all an improv kinda gal. I enjoy the look of it when other people make improv stuff, but my mind just doesn't work that way and I tend to struggle with it, so these were no cake walk for me. I do really like how they turned out, though, and I can't wait to see the whole quilt together, I think it will have such a cool look.
Also at the end of June I finished up my tutorial for Rebecca's Christmas in July-I made some fun paper-pieced Christmas coasters, be sure to check it out in case you missed it!
I've had to resist taking on any other projects after these were done so that I could focus on my nursery stuff (I didn't even get to make my second bag for the Purse-Palooza! rats...though I did get my fabric, so mark my words, as soon as my nursery is finished, it's on!) My feet have been getting obnoxiously swollen if I sit at my sewing machine for more than 30 mins-1 hour lately, especially after I've worked all day, so I'm having to do all this in pieces which is really annoying...Happily, it's coming together a lot faster (and easier...) than I expected and I'm just about finished. I plan to share it all soon, but for now I leave you with this sneak peak:

Tuesday, July 17, 2012
My Mom's First Quilt and Other Crafty Baby Love
So the last few weeks have been crazy busy, mostly filled with getting ready for baby...less than 4 weeks to go! (but who's counting....?) 2 weeks ago my best friends threw me a baby shower--can I just say I have some amazing friends and family!? My besties did such a fabulous job with the shower, we had a ton of fun and they were so sweet to take care of every detail. I love them so much and feel very blessed to have them in my life! I also feel blessed that so many ladies came to join me to celebrate our little girl...we got lots and lots of great gifts, including a ton of hand made items! I knew I had some crafty ladies in my life, but my goodness I had no idea just how crafty they all are...I can't even begin to show everything handmade I received, but I'll share a few of the highlights:
First off, my mom just started getting in to sewing a few months ago, and she's already finished her first quilt!! (Yes, that's right, she beat me to it, lol). I went home to visit my parents a few weeks ago, and my mom and I discovered this AMAZING fabric store down their way. This place had ridiculous amounts of fabrics, I've never seen anything like it...anyway, we had a blast picking out fabrics for this quilt, browsing and brainstorming and finding way more stuff than we needed...but that's the point of fabric shopping, right?? Ok, back to the point...how cute is this quilt!?
I don't have a theme for the nursery, just a color scheme (pinkish/purple and yellow, in case you're wondering), but I'm pretty obsessed with all the cute owl stuff out now, so I'm accessorizing with them :)
The owls and the trees are appliqued felt. I'm pretty sure my mom came up with the design on her own, just found a picture of an owl online and ran with it!
When we were discussing how to quilt, I tried to convince her that she should start with something simple, like wavy lines or something hard to mess up. But she's not one to just dip her toes into the shallow end, so she went full on FMQ! The border is filled with leaves and hearts, and the rest of it is some echo quilting around the shapes and cloud like shapes throughout the rest of the blue.
The backing is this fun, colorful bird fabric. The whole quilt is so soft, and I think the texture of the felt on the front will be perfect for our little one to explore.
My husband's mom and grandmom also made us some great stuff, including a basket full of a supply of cloth diapers and inserts (yep, I'm going there...wish me luck) and some burp cloths and other little goodies like that that I forgot to take a picture of...BUT his grandmom crocheted this very pretty blanket
And they made this giant fuzzy blanket that will be so great for the whole family to curl up with on the couch...it feels so luxuriously soft!
This little guy (girl?) modeling the luxuriously soft blanket was made by another one of my friends, I didn't even know things like this could be made by crocheting or knitting, I'm totally in awe!
Here's another pretty crocheted blanket I got from a friend from church, I had seen her working on it before and had been admiring it, so I was quite excited when I opened up the bag and there it was!
One of my besties (the one who inspired me to start sewing) gave me a giant bag filled with lots of stuff, alot of which was homemade, each one with a little tag like "Because mom needs to relax too" for some lavender bath salts and "Because girls just want to have fun" for a little taggie toy. It was such a cute and fun way to package a gift! One of the items she made was this gown and matching headband
So pretty! I'm pretty sure this will be her homecoming outfit.
I feel like I've barely put a dent into showing all the great homemade stuff we got...there were personalized onesies, bibs, blankets, toys, oh my!! We also had a "Decorate A Onesie/Bib" station, and all of those turned out super cute too! Ah! I could go on for hours, so I'll stop while I'm ahead...
Anyway...back to my nesting. I'll be back soon to share what I've actually been sewing!

Monday, July 9, 2012
Christmas in July Tutorial
Last week, Rebecca kicked off her Christmas in July event, and today my tutorial is being featured! Be sure to head over and check it out! While you're there, take a peek at the other tutorials that have been featured so far and enter for some great *giveaways!* :-)

Monday, June 18, 2012
Fandango Diaper Bag
I have recently come to the realization that baby-time is quickly approaching and I needed to get my butt in gear (ok, so really it was Hubby telling me that I can't start any other projects until I finish all the baby stuff that really got me going...), so I whipped up the diaper bag as my first baby project. When I decided that I would make my own diaper bag, I started searching for patterns and found quite a few free ones, but was drawn in by Anna Maria Horner's book Handmade Beginnings: 24 Sewing Projects to Welcome Home Baby, which featured a diaper bag (or as it's called in the book "Here We Go Bag") and settled on that one. The main exterior print and the interior print are both Kate Spain's Fandango, and the pink handles and pockets is Feedsack II by Sara Morgan.


I must say, I really do like the look of it, but I wasn't a huge fan of the pattern or the construction of the bag. Firstly, the pattern pieces for all of the projects were drawn over lapping each other, so I had to find some tracing paper and trace out the pieces for just this project...this became a huge pain in the butt, because the only paper I had was 8"x11" foundation paper, and of course all the pieces were bigger than the paper would fit, so I had to tape some pieces together which was not ideal (I do blame myself for that one since I was too impatient to wait until I could get to the store and get proper paper before starting). I know this type of pattern is probably normal, but I think I've been spoiled using mostly Amy Butler patterns which each come with their own page so you can actually cut them out...oh well, moving on. I also was not a fan of all the extra firm stabilizer, I think I would have preferred to use fleece instead to give it a little more "give" and versatility when it comes to being able to pack stuff in it, but I'm not sure how the over all look would have been without it being so structured. I also learned that when directions call for double sided fusible interfacing, don't cheap out and buy the sew in with plans to just use fabric glue to attach it...turns out that's a really bad plan, and I should have saved myself a lot of frustration and forked out the extra $6 or so for the right stuff...
Anyway, the directions called for just the interior divider, with an option of adding pockets however you'd like. I tried to add as many as I could with the fabric I had left over. Having never had to have a diaper bag before, I really didn't know what kind of pockets I "need", so I tried to make a small variety, hopefully it works out. I also added little rings on the inside to clip my keys to, and added the long, removable strap to the exterior so it can be worn across the body if I so choose.
Turns out it's really hard to get a picture of the inside of a bag, but you can kind of see some of the pockets here.

Here it is loaded with a few items to test it out a bit...so far so good, but only time will tell! It is REALLY big, so it should be a pretty good bag for those times that I need to bring everything with me, and it will be great to be able to have room for my stuff as well as baby's without having to carry a separate purse.
I am entering this bag into Purse Palooza over at Sew Sweetness. There are already so many great entries in the Flickr pool, so if you need any inspiration for any bags or purses for yourself, you should definitely check it out!!

Saturday, June 16, 2012
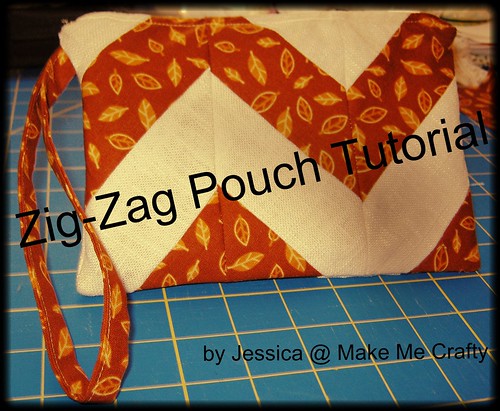
Zig-Zag Pouch Tutorial
When I decided to make a zig-zag pouch for my Modern She
Made Swap partner, I searched the inter-webs for how to make zig-zags…I kept
coming up with various tutorials that used HSTs or odd triangle stacking
shenanigans that I just wasn’t down with for making just a little pouch, and I
thought there MUST be a simpler way, so I put my brain to work and reached back
to middle school geometry to come up with another way that made more sense to
me. Please note that in no way am I
claiming to be the inventor of this method, in fact I’m pretty sure I saw
something similar out there recently, but I did find this way easier than all
that triangle cutting madness and wanted to put together a tutorial using what
worked well for me. Bare with me as this
is my first tutorial so it may be a little rough…please leave me a comment if
anything needs to be clarified or if you have any feedback on how I can improve
for future tutorials! Hope you enjoy!
J
*2 fat quarters for the exterior (you will not use nearly a
full fat quarter, you just need enough to get 12 rectangles measuring 2”x6” in
each fabric, plus a strip for the wrist strap and scraps for the zipper tabs)
*2- 8” by 6” rectangles for the interior
*8” zipper
*Marking tool
*3” wide 30-45-90 ruler
*Rotary Cutter and mat
*Turning tool
*Hand sewing needle and thread (optional)
- Start with 3- 2” wide by
18” long strips of each exterior fabric to trim down into your smaller
pieces.
- Cut the strips down so you
get 12- 2”x6” pieces of each exterior fabric
- Get two of each of your
exterior fabric strips together for your first panel and measure in from
the left edge of each of the strips 1.5” and make a small mark
- You will need the strips
to be staggered by this 1.5” like this…
- Place two strips (one of
each fabric) right sides together, matching the long edges and starting
the short edge along the mark you made, sew together with ¼” seam
allowance
- Sew the other two strips
in the same way, then sew these two sets together (make sure to alternate
colors). Press your seams open. You should now have something like this
- Using a 3” wide, 30-45-90
ruler, line the 45 degree mark up with the top raw edge and use your
rotary cutter to trim the right edge, be sure the width of the ruler fits
completely on the fabric on both sides before you cut
- Now turn it around 180
degrees and again line the 45 degree mark up with the top raw edge and
trim the other edge
- Your piece should now look
like this
- Line the piece up with the
vertical lines on your cutting mat, and square off the top and bottom
edges so you have a nice rectangle
- Repeat steps to make two
more matching rectangles, then repeat the steps again to make 3 more in
the opposite direction. (When
measuring in 1.5” to stagger the pieces, measure from the RIGHT instead of
the left and stagger in the opposite direction from the first 3 you made
as demonstrated below)
- You now have 6
rectangles…3 for the front and 3 for the back (sorry, picture only shows 3
of them)
- Take the three rectangles
for the front and sew the first two together, making sure to match up the
seams and also making sure you’ve got two with angles going in opposite
directions. Now add the third
rectangle, again making sure your angles are going in opposite directions
and that your seams are matched up. Press seams open and
square it up
- Repeat steps so you have a
second panel. Notice in the picture
below that in the top one, the angle starts down and in the bottom one the
angle starts up…this is so that when you sew the pouch together the zig-zag
will continue all the way around
- Cut two small pieces for
your zipper tabs…you want them at least as wide as the zipper, and about 3
inches long. Fold them in half with
wrong sides facing, matching up the small ends and press. Place them on the end of the zipper
strip so that the folded end goes past the zipper stop, when the pouch is
finished you want about a half of an inch or so showing, depending on your
preference. Make sure the zipper pull is out of the way and sew across the
tab, close to the folded edge
- Now line up the edge of
the zipper with the top raw edge of the exterior panel with the top side
of the zipper facing the right side of the panel, pin in place.
- Line up the edge of the
interior panel with the edge of the exterior panel and zipper, now making kind
of a “zipper sandwich”, so that the right side of the interior and
exterior panels are facing, pin in place (you can remove the other pins
now that the whole sandwich is pinned in place)
- Make sure the zipper pull
is at least half way open, and using your zipper foot sew close to the
teeth of the zipper. When you get to the zipper pull, stop your machine
with the needle in the down position, lift your presser foot and carefully
pull the zipper back towards the end you’ve already sewn. Continue sewing
to the end. Repeat to attach the
other two panels to the other side of the zipper and press the seams. You
can top stitch along the edge if you’d like to finish it off nicely (this
will also help to keep fabric out of the zipper)
- If you want to have a
wrist strap, take a strip of fabric, about an inch wide (or more if you
want the strap wider) and twice the length you want your strap to be. Fold
in half matching the long edges and press, stitch down the edge and turn
the tube right side out (this can be tricky with such a skinny tube…I find
using a crochet needle helps along with some tweezers to help pull it
through). Press the tube flat and top stitch along the edges
- Now it is time to turn
this into a pouch…make sure you leave the zipper open all the way, open up
the panels so that the right sides of the interior panels are facing and
the right sides of the exterior panels are facing, lining up all of the
edges (make sure to try to match the seams for the zig-zags!), pin in
place. For the wrist strap, fold in
half, place in between the two exterior panel about an inch or so down
from the zipper (or in whatever placement you prefer), and line up the raw
edges of the strap with the raw edges of the panels, pin in place
- The zipper tabs should be
folded toward the exterior panels as I tried to show in this picture. It
may help to press it down a bit
- Sew along the edges all
the way around, but leave a few inches open at the bottom of the interior
panels. Make sure to back stitch at each end of the opening. Trim the
corners and the zipper ends to reduce bulk but be careful not to cut your
stitches. Turn it right side out
using the opening you left in the bottom.
Use a turning tool to turn out all the corners. Fold the edges of the opening in about a
quarter inch and press, sew the opening shut by either hand stitching with
a slip stitch, or machine stitching close to the edge. (yes, this picture
is missing the strap…I actually went back and added it later because I
forgot the first time…but, your strap should be on the outside now…)
- Now you can push the
lining into the pouch and marvel at your handiwork!
Have fun playing with the design of this pouch…you can quilt
the exterior, make the zig-zags skinnier, make it scrappy, the possibilities
are endless! If you do make something with this tutorial, I’d love to see it,
so feel free to email me a photo of it J

Subscribe to:
Comments (Atom)


.JPG)


