Showing posts with label Finished projects. Show all posts

Thursday, July 19, 2012

Blocks and A Preview

In between all the baby showering, cleaning, working and napping, I've actually managed to fit in some sewing.  June was my last month participating in do.Good Stitches, and even though I thought my blocks were going to be way late, I actually managed to get them out on time..go me!

June 2

June 1

For this month, Amanda of My Sewcial Hour picked one of my fav color schemes-yellows, blues, greens, whites and grays, so I had lots of scraps to work with.  The block we made is the Improv Chevron using this tutorial by Six White Horses.  If you've been reading my blog for any length of time, you probably know that I'm not at all an improv kinda gal.  I enjoy the look of it when other people make improv stuff, but my mind just doesn't work that way and I tend to struggle with it, so these were no cake walk for me. I do really like how they turned out, though, and I can't wait to see the whole quilt together, I think it will have such a cool look. 

Also at the end of June I finished up my tutorial for Rebecca's Christmas in July-I made some fun paper-pieced Christmas coasters, be sure to check it out in case you missed it!


I've had to resist taking on any other projects after these were done so that I could focus on my nursery stuff (I didn't even get to make my second bag for the Purse-Palooza! rats...though I did get my fabric, so mark my words, as soon as my nursery is finished, it's on!)  My feet have been getting obnoxiously swollen if I sit at my sewing machine for more than 30 mins-1 hour lately, especially after I've worked all day, so I'm having to do all this in pieces which is really annoying...Happily, it's coming together a lot faster (and easier...) than I expected and I'm just about finished.  I plan to share it all soon, but for now I leave you with this sneak peak:


Monday, June 18, 2012

Fandango Diaper Bag

I have recently come to the realization that baby-time is quickly approaching and I needed to get my butt in gear (ok, so really it was Hubby telling me that I can't start any other projects until I finish all the baby stuff that really got me going...), so I whipped up the diaper bag as my first baby project. When I decided that I would make my own diaper bag, I started searching for patterns and found quite a few free ones, but was drawn in by Anna Maria Horner's book Handmade Beginnings: 24 Sewing Projects to Welcome Home Baby, which featured a diaper bag (or as it's called in the book "Here We Go Bag") and settled on that one.  The main exterior print and the interior print are both Kate Spain's Fandango, and the pink handles and pockets is Feedsack II by Sara Morgan.

Diaper Bag Exterior 

I must say, I really do like the look of it, but I wasn't a huge fan of the pattern or the construction of the bag.  Firstly, the pattern pieces for all of the projects were drawn over lapping each other, so I had to find some tracing paper and trace out the pieces for just this project...this became a huge pain in the butt, because the only paper I had was 8"x11" foundation paper, and of course all the pieces were bigger than the paper would fit, so I had to tape some pieces together which was not ideal (I do blame myself for that one since I was too impatient to wait until I could get to the store and get proper paper before starting).  I know this type of pattern is probably normal, but I think I've been spoiled using mostly Amy Butler patterns which each come with their own page so you can actually cut them out...oh well, moving on.  I also was not a fan of all the extra firm stabilizer, I think I would have preferred to use fleece instead to give it a little more "give" and versatility when it comes to being able to pack stuff in it, but I'm not sure how the over all look would have been without it being so structured.  I also learned that when directions call for double sided fusible interfacing, don't cheap out and buy the sew in with plans to just use fabric glue to attach it...turns out that's a really bad plan, and I should have saved myself a lot of frustration and forked out the extra $6 or so for the right stuff...

Anyway, the directions called for just the interior divider, with an option of adding pockets however you'd like.  I tried to add as many as I could with the fabric I had left over.  Having never had to have a diaper bag before, I really didn't know what kind of pockets I "need", so I tried to make a small variety, hopefully it works out.  I also added little rings on the inside to clip my keys to, and added the long, removable strap to the exterior so it can be worn across the body if I so choose.  

Diaper Bag Interior 

Turns out it's really hard to get a picture of the inside of a bag, but you can kind of see some of the pockets here.  

Diaper Bag

Here it is loaded with a few items to test it out a bit...so far so good, but only time will tell! It is REALLY big, so it should be a pretty good bag for those times that I need to bring everything with me, and it will be great to be able to have room for my stuff as well as baby's without having to carry a separate purse.  

I am entering this bag into Purse Palooza over at Sew Sweetness.  There are already so many great entries in the Flickr pool, so if you need any inspiration for any bags or purses for yourself, you should definitely check it out!! 

Thursday, June 14, 2012

The Lone Starburst Pouch

Now that Rebecca has (finally) received the pouch I made for her for our mini-swap, I (finally) get to share it! This was obviously a very long time in the making...I actually started with this... 

Star 

...a Fancy Folded Star.  I love how it was turning out, but it was just too bulky to make into a pouch.  I had to come up with a new plan so I searched for something with a similar textured kind of look...enter The Lone Starburst! I found the tutorial at Six White Horses for this block.  I felt like it still had the same feel to it as the folded star, but much more appropriate to use in a pouch.  I wound up shrinking the pattern by 50% which made the paper piecing quite tricky, but it was fun to put together.  Luckily we had a little sun this weekend so I was able to sneak in some decent pictures.


I finished it off with some hand stitching around the star, I think it gives it a nice textured look. 


Check out my zipper tabs! Not perfect, but getting better...I still can't quite get them totally squared off.  Any suggestions? 


Finishing the back is something that I floundered on for a while and is probably why it took me so long to finish...I didn't want to overwhelm the pouch with another patchwork something-or-other on the back, but I didn't want it to be plain either, so I did some more hand stitching in an angled pattern to give just a little bit of interest. 


I finished the whole thing off with a matching key fob...I have recently become obsessed with these and want to make them with any excuse I can find so of course she had to have one...

I had a lot of fun making this, I was pretty nervous at first to try to come up with something that Rebecca would appreciate (and to make it good since she is so talented!), and in the end I really like how this turned out.  It was definitely out of my comfort zone a little bit what with all the hand stitching, but I think I'm improving! Maybe soon I will break away from just the straight quilting lines and try some other embroidery ;-)

I am linking up with Katie at There and Back for The Handmade Parade this week.  Always a good place to go see what some other people are up to for some hand stitching inspiration!!

There and Back


Tuesday, May 29, 2012

Tropical Storms = Sewing Time

This weekend was perfect sewing time...not only did I have a three day weekend, with hubby being gone one of those days, but it rained pretty much the ENTIRE day Monday thanks to Tropical Storm Beryl...it was fantastic.  We desperately need the rain around here, and it was a great excuse to sit around in my yoga pants all day sewing my lil fingers off.

Thanks to this marathon sewing, I was able to check a few things off of my list (oh, and rainy days + mailing deadlines = bad pictures, I apologize in advance...):

Coming at ya partner!

My package for my partner for Modern She Made Swap is all ready to go! (I even had a small box that I received a few books in from Amazon today that was JUST the right size...score!)


In addition to the bag, I also made a little key fob and zippered pouch. I am working on putting together a tutorial for the pouch as well! 


Imagine Circle, do.Good Stitches May (1)

Imagine Circle, do.Good Stitches May (2)

I also completed my blocks for do.Good Stitches. I really liked how these turned out and they were really easy to put together.  The block is called Radiant Ring, and we used the tutorial at Don't Call Me Betsy to make them.

I also got some progress made on a few other items, but having these two things ready to put in the mail tomorrow is a HUGE relief...I was starting to feel the pressure of getting it all done! So big shout out to Beryl for helping make it happen. 

In other exciting news, I just read about the Purse Palooza (I keep wanting to call it "Pursealooza"...doesn't quite have the same ring to it, does it?) that is being held through June at Sew Sweetness.  Now, as you might already know, I'm pretty obsessed with making bags, so this is right up my alley.  I have a baby bag that I'm just getting started on cutting pieces out for, and plans for The Chelsea Bag by Vanessa Christenson, totally perfect timing! I realized while planning these bags that I've never actually made a bag for my self, though I've made plenty of bags as gifts! I think it's high time I make some for myself, don't you??  

I hope you all had a fun, relaxing, productive holiday weekend! 

Friday, May 25, 2012

Swappy time!

Oh hey guys! So nice to see you again...have you been as distracted as me from doing anything BUT entering giveaways this week!? Kind of glad its over now so that I can get back to actual sewing, lol. (I can't only blame SewMamaSew Giveaway Day though...I also just discovered The One Stop Giveaway Shop, where Diane and Rachael find giveaways and post links to them, or if you are holding a giveaway you can fill out a form to be listed...I'm totally addicted...)

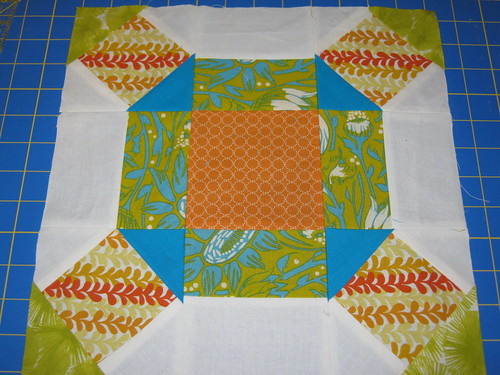
Anyway, I did manage to get some work done on my Modern She Made Swap item in between all the entering of giveaways and discovering LOTS of great new blogs, thankfully, cause this puppy's gotta get mailed out next week! I toiled for a while over what to make...the rules called for something with circles. Could be anywhere in the item, but had to include a circle somehow.  As this was my first big swap, I was feeling the pressure of trying to figure out something to make that my partner would enjoy, so it actually took me a few weeks until I felt comfortable enough to post anything to start with...

This is what I started with (without details as to why...because this hasn't been sent yet and my partner could be reading this!! ;-) )

Swap idea 1

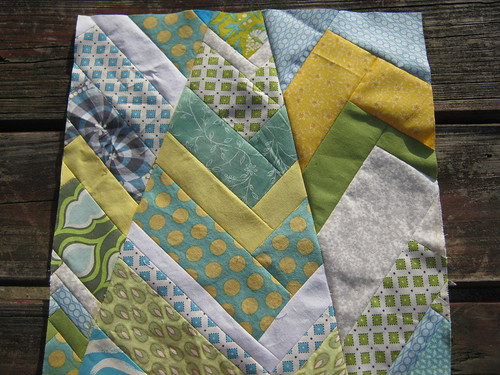
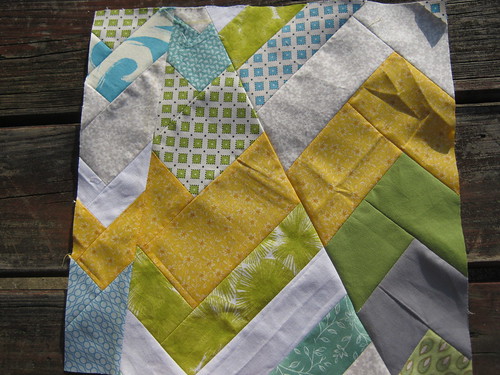
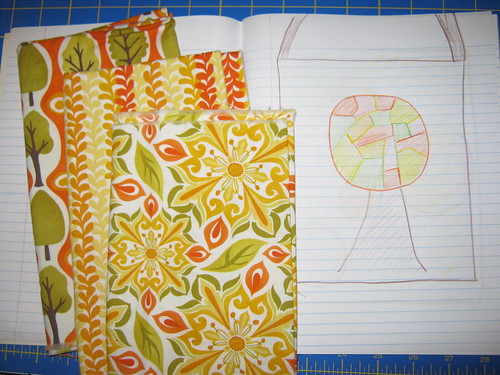
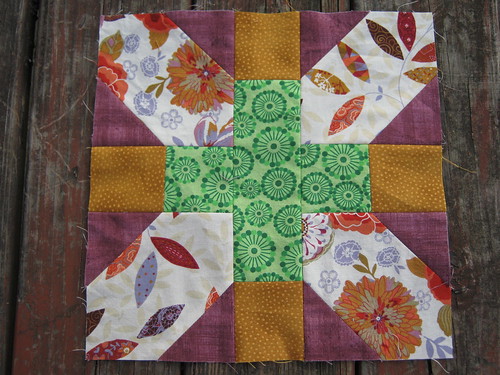
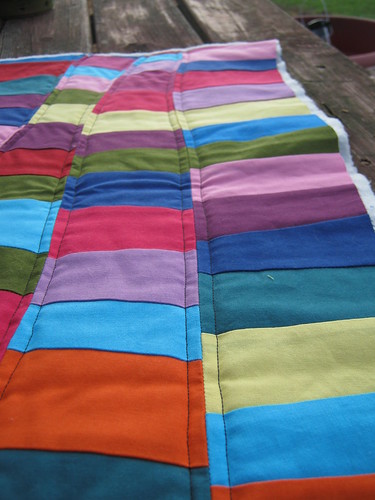
Idea one involved an improv pieced circle supposed to be a tree...

Swap idea 2

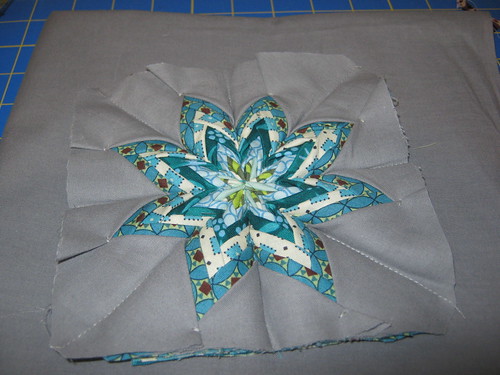
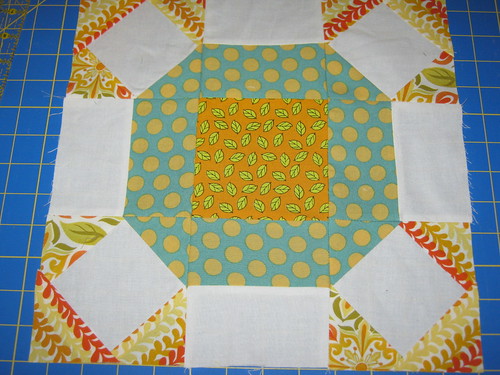
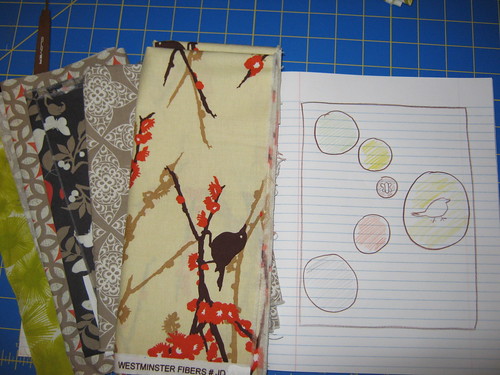
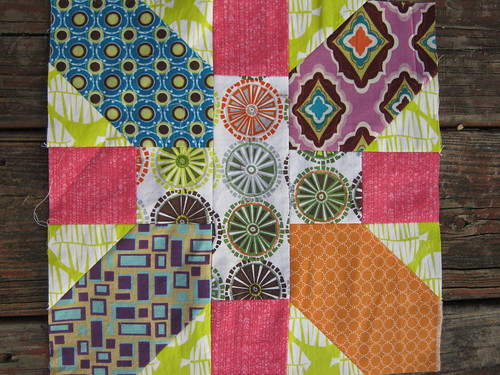
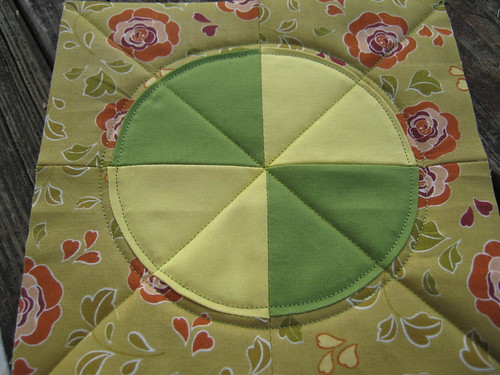
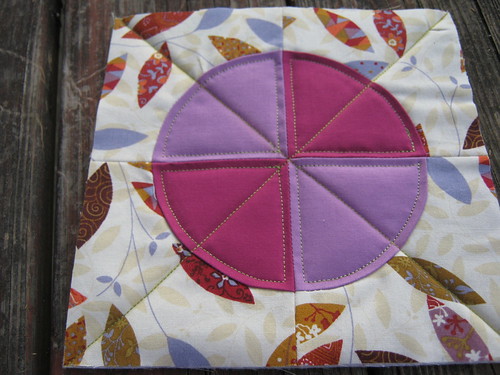
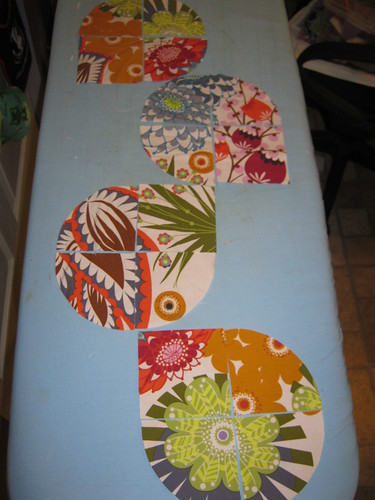
Idea two was for some "port-hole" type things with some fun fussy cutting....
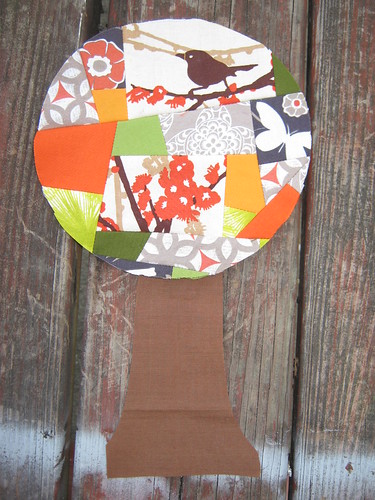
And I went with...

Tree?

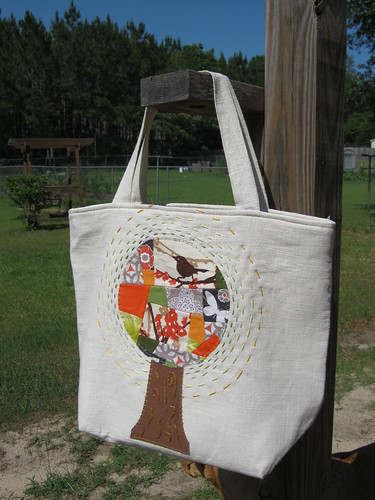
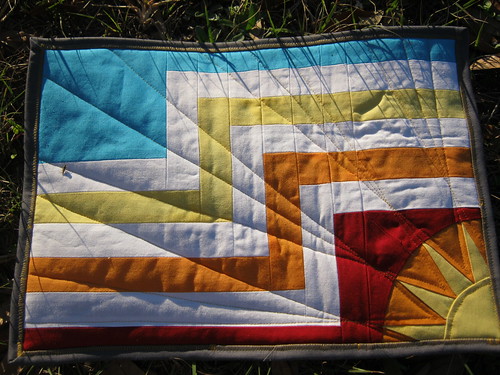
A combination of both!! I like the fussy cutting idea, but the port holes were too much within my comfort zone, and I really wanted to do this swap to push my boundaries a little bit.  I do not have much practice with improv piecing (to be honest the idea of it makes me mildly anxious...) so I decided to go that route.  At first I wasn't sure about it, I almost wound up scrapping the whole thing, but once it transformed more into the "tree" I really started to enjoy it. 

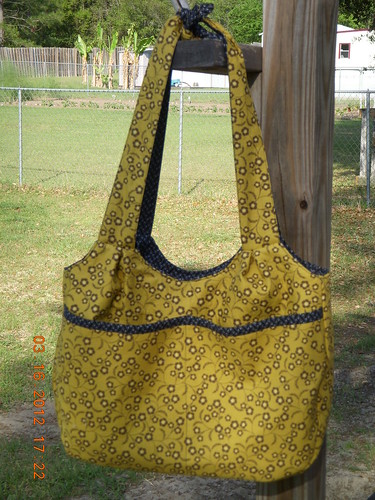
I appliqued it onto a tote bag (yes, I AM obsessed with making bags, so this part certainly wasn't out of my comfort zone...), made with a nice natural looking linen.  Turns out, linen is alot harder to work with that I had anticipated. I had the hardest time squaring it up and getting straight cuts, it kept getting all wonky on me! I love the look it has though so I will definitely be trying some other stuff with it (so ya know, if you have any tips on this stuff, help a sister out!!)

MSMS Bag complete

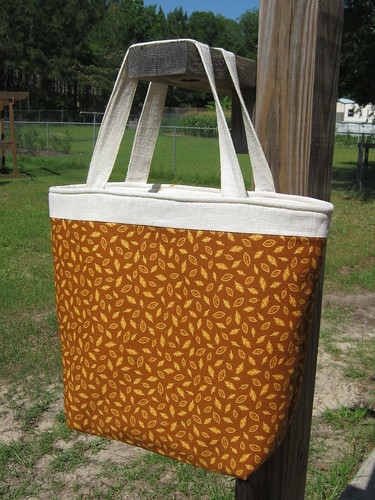
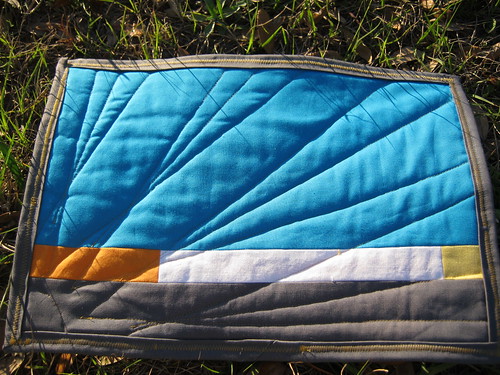
I ended up making the bag reversible, because I love items with multiple functions so it just had to be done...

MSMS Bag

I love the two sides...the outside is very fun and whimsical to me, while the reversible side is a little more classic and neutral. 

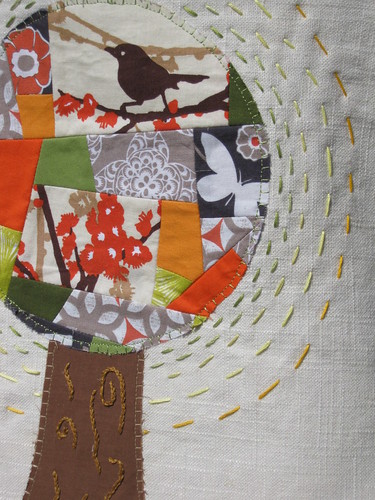
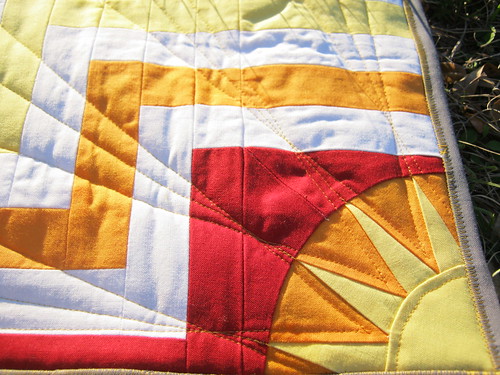
I also decided to add some hand stitching to the tree to add some interest. This was my first time hand stitching, and in true Jess fashion I started with absolutely no plan (ok...I had a plan to start with, but I totally did not stick to it what-so-ever)

MSMS Bag

I used some chain stitching to give the tree base some texture, and then just some straight lines around the tree in increasing size/distance...it reminds me of a radiating sun and makes me have warm happy feelings about this bag!  I don't think my hand stitching is very accurate, but for a first time I'm pretty satisfied with it. 

I really hope my partner enjoys this, I wound up having a lot of fun creating it! By the end of the weekend I also hope to be able to share my item for my mini-swap with Rebecca (or at least a sneak peak of it anyway...) and, if all goes according to plan, I am also hoping to have a tutorial! (There, I announced it, now I *have* to do it...right?) 

I'm linking up this week with Handmade Parade at There and Back...click the button below to check out some other great handstitching projects! 

There and Back

Wednesday, March 28, 2012

WIP Wednesday..

Something about that new stack of fabric with the prospect of making some new exciting things really gave me the kick in the pants I needed to get some progress made on some other stuff, 'cause these last few days I've been a bit sew crazy, trying to get as much done as possible in the little time I have to work on it...

First up, I started and finished my blocks for this month's do.Good Stitches. This month was led by Jess @ SewCraftyJess, and she chose the Japanese x and + blocks.  I was a bit scared of these at first, but once I looked at the tutorial and started them, they were so stinkin easy!! I can see why these have been really popular...

March do.Good Stitches Block 1

March do. Good Stitches Block 2

We had free reign on color, and she said "the more vibrant, the better"...but I think I got a little TOO vibrant on my first one?  I don't know, I'm not really big on scrapiness, so it bothered me not to have any kind of cohesion...it started to grow on me a bit after a while, but I did decide to tone down my second one just a tad. 

Next up is some progress on my Curves projects! I finally got my pot holders and Rainbow Road runner quilted, and I'm just waiting for some more time to bind them.  I also tried out two of the other projects, both of which have been epic failures! One is fixable, I just got super frustrated and didn't want to look at it anymore, the other I totally scrapped...good thing I was using scraps for that one so no tears shed on lost fabric...apparently advanced improv curves are not my friend!

DP Pot Holder 1  DP Pot Holder 2  DP Pot holder backings...

Rainbow Road quilted  Close up of Rainbow Road
Rainbow Road backing

FINALLY I got to start on my Retro Flowers quilt! I happened to win a set of templates from the lovely Jill @ Made On Mainstreet and they came in today so as soon as I opened the package I ran back to my sewing room and got to cutting!  It was suggested to me that Lou Lou Thi might not have been the best choice to use for this due to the larger prints as they will get a little lost which unfortunately I did not even think about when choosing this, but I decided to try out my first block with one of the larger prints to see how it works...I had to fussy cut alot which stinks, but I think it will work.

Retro flower petals

I've got some big plans to get started on, but this weekend is my birthday and my parents are coming to town so I will probably not get much done for a few days, BUT I am super excited about what I've got planned!!

Anything exciting going on in your neck of the woods?? I'm linking up with WIP Wednesday at Freshly Pieced!


Wednesday, March 21, 2012

Gifting Handmade

This time of year is a time known to me and my friends as "birthday season".  Beginning Feb 11, I have someone close to me with a birthday every week (sometimes 2 a week...) all the way up until we end with my birthday on April 1st.  It gets kind of crazy trying to keep up with all of them and trying to get cards/gifts to everyone on time, but this year I'm proud to say I'm doing pretty good having only been late on one so far. Woot! Go me! As I mentioned before, I was working on completing a purse for one of my friends to give to her for her birthday. I did get it finished, but as I suspected it was not quite on time, but only a week late which is pretty good for me to be honest, lol.

Sunday Sling

Sunday Sling Reverse

Sunday Sling Reverse 2

This pattern is the Reversible Sunday Sling by Amy Butler.  It went together really well and if I hadn't gotten so busy with some other stuff going on, I definitely could have finished it in just a few days.  I love this pattern and might just have to make one for myself one day also!

I hadn't intended on making something for my bestie, as I made her a purse for Christmas, but the only idea she gave me for what she wanted for her birthday was "make-up brushes". Well, I have no idea what brushes she uses so I will just get her a gift card to Sephora so she can pick them out, but I decided to whip up a quick make-up brush roll to go along with that. 

Make Up Roll

Make Up Roll inside

Make Up Roll Outside

I loosely followed this tutorial which was super easy, but I made a few changes including the pocket size, adding binding, and quilting it.  The quilting was just some quick wavy lines which I had not done before but I'm thinking of using it on a larger project, so perfect chance to try it out!  This took me all of 3 hours to do, start to finish, and if I hadn't done the quilting and binding, I'm betting it would have only taken about an hour. All in all, a quick, fun little gift..I will definitely be remembering this and possibly even making a few to stash away for future use. 

I also got some hand made stuff from my other bestie, including this lemon-sugar hand scrub she made.

Hand Scrub

Check out the totally cute way she finished off the jar! This smells delightful, and um..I kinda want to eat it...

She also gave me this pottery that was made by one of her friends.

Pottery

Pottery 2

I love the detailing on this mug!  Her friend that made this has an etsy shop if you're interested, not much is in there right now but she is quite talented! 

The best gift of all has been that I got to spend an afternoon with both of my two best friends.  The three of us live in separate towns now and it's hard to get all of us together at the same time, but we were able to make a quick trip this past weekend to get together for a bit.  It was really short, but really great to be able to spend some time together :-)

Linking up with "This Week @ Love Affair with my Brother"!


Sunday, March 4, 2012

Modern Mini-Good Morning Sunshine

Yep, that's right friends...I got it done in time! Woot! I'm quite proud of this little guy, it is the first time I've come up with a design and figured out how to piece it all on my own (other than the sun block...). I'm calling it "Good Morning Sunshine!" which was very fitting, because today was the first day we've had nice sunshine all week, so I was able to get some pictures of it outside.

Good Morning Sunshine!

This originally started out as a little mug rug, but trying to piece those itty-bity-teeny-tiny-pieces and trying to get them to line up was just not happening...so, it got enlarged to a mini/wall hanging quilt, finishing at 14"x10". For the quilting, I followed the lines from each side and the middle of the rays, I like the simple effect it has over all.  For the fabrics, I used Kona Peacock, Butter Cup, School Bus, and Ruby for the sun and stripes (along with solid white..) and then Kona Charcoal for the binding.

Close up of sun

I did use a paper-piecing pattern for the sun part, it is a part of a New York Beauty block.  I got the pattern from here, but the directions were in German so I followed this tutorial.  And thanks to my new skills at sewing curves, this was a cinch! 

Backing

The backing I used some scraps from the front.  Actually, I cannot tell a lie...the blue got switched to Kona Turquoise as I ran out of Peacock...but who's keeping track?? I used the zig-zag binding tutorial as usual (one of these days I'll work up the courage to try a different method again...), the binding on the back is obviously a little thicker than on the front so I missed the edges of it, but oh well, ya live ya learn. The good news is, it only took me *3* tries this time to get the ends attached properly!  Success! 

Good Morning Sunshine in it's new home!

Here she is in her new home above my sewing machine.  I like that it adds a nice little bit of light to the area, though it's a little small for that spot so it may wind up finding a new home eventually, but for now it is perfect! 

I am entering this into Ellison Lane's Modern Mini Challenge, there are some amazing entries to far, so be sure to stop by and check them out! Also, I am linking up with {Sew} Modern Monday at Canoe Ridge Creations.

Modern Mini Challenge